Machine Sewn steeks
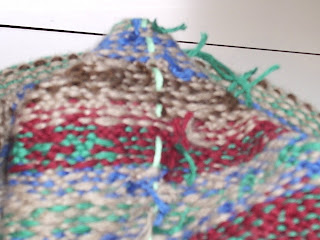
 This is the 2nd of the Steek posts, so go read the last entry first, Here are the armhole steeks after knitting but before anything else the first picture is the top of the steeks, and the next picture is the bottom.
In order to machine sew the steeks I need to mark the center stitch as a cutting line, there are 2 ways that I use, first, (and safest) is to run a line of basting with some contrasting waste yarn.
For some reas
 on the waste yarn did not want to show on the right (public) side so I simply sewed the steek from the inside of the sweater, doesn't matter, both work.
The basted side happened to be the side that was start of round and the ends need to be attended to before the steek is sewn or I end up practicing the words-not-to-be-said-in-front-of-Mother, or the granddaughter for that matter. So after attending to the yarn ends. (tied in square knots and tri
 mmed, (remember the steek will be folded back and sewed down so nobody except me(and now you, of course) will know)) I preceded to pick up a yarn needle and waste yarn and sew up the center line of stitches. (Those ends you see are from the 3-needle bindoff, and will be attended to later, since they need weaving in)
Up stairs to the machine, (everybody is up now) and the machine has red thread. that
 is fine, use whatever is already on it, because, (all together now) the steeks will be folded back and sewn down and no one will know! Besides with red you can see what I did, this is all for you dear Blog reader, and yes, also because I am lazy. I used a multiple stitch zig-zag because 1. it is stretchy, and 2. I paid a lot of money for this machine and I should use a feature every now and then, and 3. it only involves pushing 3 buttons, and I am not that lazy.
The other method I
 use is for those
 And here it is after sewing, and there is a closeup because I did it right and want everyone to see it. (and if I had messed up there probably would not have been, maybe)
And the last picture is what the basted one looked like from the right side. These are now ready to be cut with my tiny sharp embroidery scissors when I am rea
 dy to put in the sleeves, which will be after I do the neckband.


1 Comments:
At 9:18 AM, Viki said…
Oh my head hurts!
Really it does.
Now,
Next time you show me steeks, please use a solid colored sweater, as I had a horrible time seeing straight with this headache.
Glad to see you have recovered from your trip. I missed you.
Viki
Post a Comment
<< Home